
Curtains 🌙

Disclosure: This blog contains affiliate links. I will receive a commission for items purchased through these links at no extra cost to you. I appreciate your support! Please read all labels and follow all manufacturer safety recommendations when working with paints, stains, and other equipment.
Everything you need 👇
Recently I decided it was time for me to stop living in a fishbowl 🐠
When I moved into this house a year ago I got some paper shades for the bedrooms but never did anything to the living room. It didn’t weird me out at first, but the longer I live here the more creepy it feels sitting in here at night with nothing on the windows haha
To fix this I started by installing blinds in the big windows. I got cellular blinds from the Home Depot and the process was pretty easy! Start by measuring your window opening in a couple of places. For example my window opening was smaller at the top than at the bottom for some reason. Then write those measurements down and go to the store and find an employee. When you buy the blinds you will have to have them cut them for you in the store with this really fun looking machine they wouldn’t let me use lol
I did end up having to go back to the store three times to have them trim down the blinds more and more. So maybe just subtract a little from your initial measurement? The blinds come with all the equipment to hang it up, you will need a drill tho!

I ended up getting these for all the windows in my house! For the living room, my office, and my guest bedroom I got the light filtering blinds. For my bedroom I got the blackout version. That might have been a mistake because now it’s so hard to wake up in the morning and all I want to do is sleep haha
Learn from my mistake 😅
When it came time to hang something over the slider is when things really started spiraling out of control lol
I love my back slider because it lets in so much light but there really is no great way to discreetly add a window covering over them. The first thing that came to my mind was to hang up a standard curtain here.
Here is the curtain rod and the curtain that I ended up using for this part of the project. And while I think this would have looked ok on it’s own…it just looked so weird next to the windows for some reason. It made the slider look like a really weird size and I’m not sure how to describe it better than just awkward!

I left it up for a week and tried to convince myself I liked it, but ultimately decided I couldn’t stand it. Here is a gentle reminder that it is ok to change your mind!
Change of plans 🔁
SOOOooo after a little bit more thought I decided to treat the slider and the windows just as “one” big window with one big curtain to cover it all. My hope was that this would make the room feel so much more seemless!
The general rule with curtains is that you want to hang them as high and wide as you can, but the only problem with this is that when I combine the slider and windows together…. that is 17 feet long 😅
SO I decided to install a curtain track system. These are incredible because you can custom the length to whatever size you need!
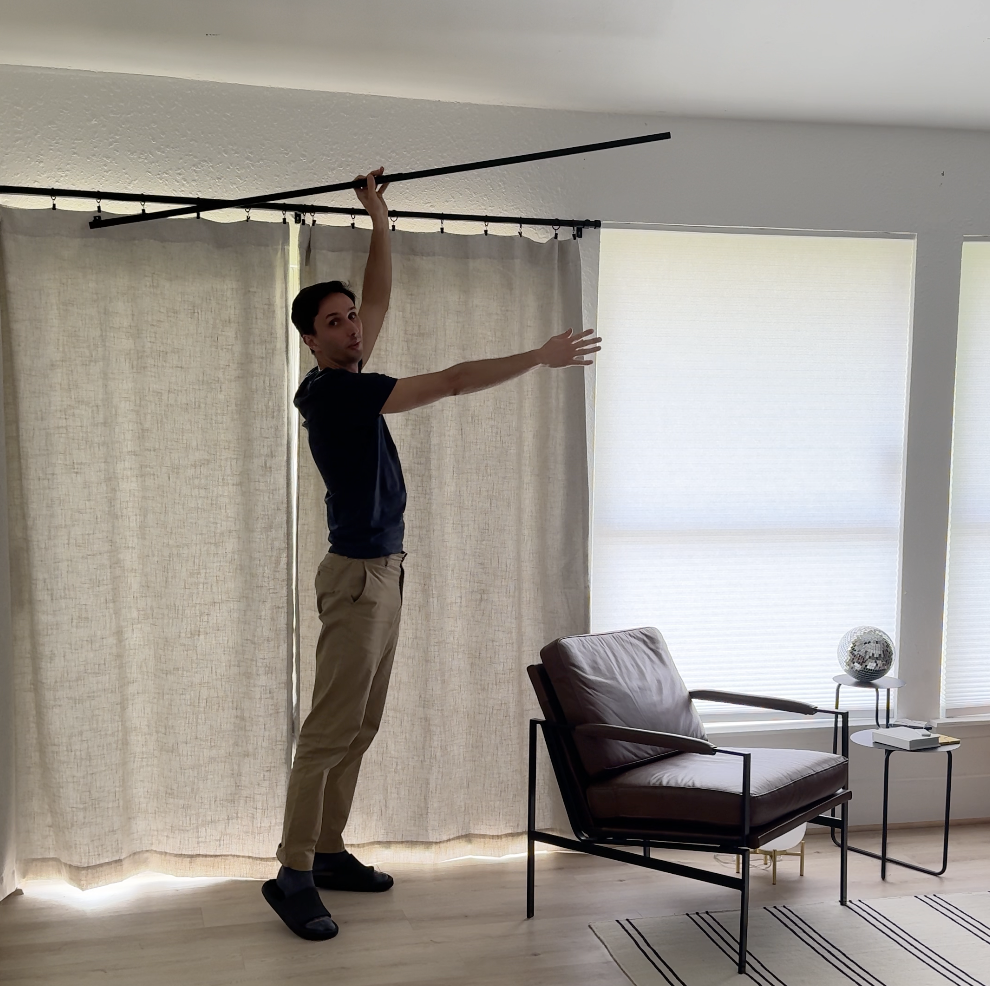
To install, first you will need to get a laser level. This will help you make sure you get all the track system brackets installed correctly. I wanted these curtains to be as high as possible and I didn’t have a tripod that was big enough for that, so I ended up putting the level on my bookshelf and cantilevering it off the side of some books 😂

I got lucky and there was a horizontal stud where my brackets needed to go, but if you don’t get that lucky I would recommend using heavy duty drywall anchors.
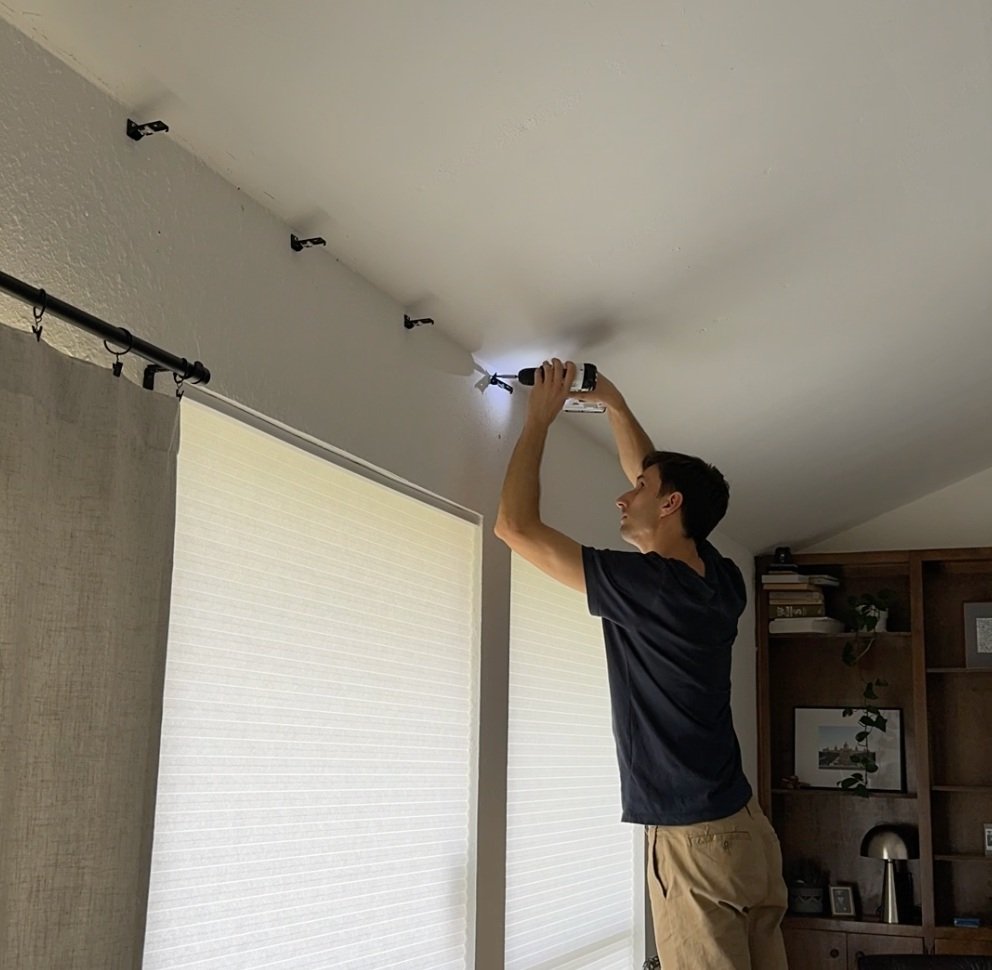
Next step is to clip the track system into the brackets. The track system comes in a couple smaller pieces that you will need to clamp together. Ideally you would be able to connect all the track pieces together and then clip that up on the wall all at the same time. I was doing this by myself and couldn’t hold a 17ft long metal pole level lol so I ended up just doing it section by section and screwing the tracks together when they were up on the wall.


Depending on the size of your windows you might have to cut the track system to fit perfectly. To do this you will need a hack saw. This looks a lot scarier than it is and only took like 2min to cut!

After you get the track system in, there are these little hooks with wheels you get to slide in. This is the most satisfying part of the process for sure!

Next step is the curtains! I used the Ikea Ritva Curtains for this. This was my first time using them, but I like that they still let a good amount of light in and at night still provide privacy. The link I provided goes to Amazon, but at Ikea they have multiple sizes for the curtains depending on what you need!
These curtains have a lot of hanging options, but I opted to use these metal hooks (I got mine at Ikea, but these from Amazon seem like a better deal). These hooks allow you to hang the curtains on the track, but also create a pleat in your curtain.

To make the pleats you use the tab system on the back of the curtain. You put one end of the metal hook into a tab, then fold the curtain a bit before putting the other end of a hook in a different tab. Just make sure you have a consistent spacing each time you put a new hook in, I think I had about 10 tabs spaced between my hooks.
Last step is to hook the curtains into the track system! If you have a steamer that would be really helpful to get the wrinkles out of the curtains.

I LOVE LOVE LOVE the way this looks. It just makes the room feel so much more cohesive and your eye doesn’t immediately get drawn to that slider LOL


I’ve had these up for a couple weeks now and have also noticed the room doesn’t get quite as hot now + I’m loving the privacy (especially since my neighbors have currently torn down my back fence to replace it LOL)
I hope this helps with your curtain journey, and just remember the golden rule of curtains: hang them as high and wide as possible!
Oh P.S. I also hung up this really fun and cheap hanging light in my dining room! I like that it kind of reminds me of the sun!

